beauty
How to Create Homemade Lip Balms and Tints
Welcome to the world of personalized lip care, where the beauty of crafting your lip balms and tints unfolds. In a market filled with countless options, there's something uniquely satisfying about creating products tailored to your preferences. Whether you're a DIY enthusiast or a newcomer to the world of homemade beauty, this guide will walk you through the top tips for concocting lip balms and tints that pamper your lips and reflect your style. Get ready to embark on a delightful journey of creativity and self-care!

Gather Your Ingredients: Keep It Simple, Keep It Natural
Creating your lip balm doesn't mean you need a chemistry degree. You'll be amazed at how few ingredients you need. Start with a base of beeswax and coconut oil – these form the foundation of most lip balms. Beeswax provides a solid texture, while coconut oil adds moisture. If you're feeling adventurous, add shea butter or cocoa butter for added richness.
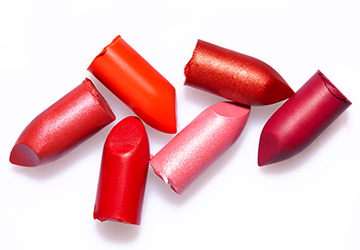
Consider using natural ingredients like beetroot powder, cocoa powder, or even a bit of lipstick for tinted balms. These add colour and come with their own set of nourishing properties. Remember, the simpler, the better. Aim for natural, organic ingredients to keep it spartan and toxin-free.
Tools of the Trade: Basic Kitchen Gear Will Do the Trick
You don't need a fully equipped laboratory to make lip balm magic happen. Raid your kitchen cabinets for simple tools like a saucepan, a heat-resistant bowl, and a whisk. When transferring the mixture into containers, a silicone spatula will be your best friend.
Remember the containers themselves! Empty lip balm tubes or small jars work perfectly for storing your creations. Clean, sanitize, and repurpose old containers to keep them eco-friendly and spartan. Remember, the goal is to keep it simple and avoid unnecessary clutter.
Melting and Mixing: Low and Slow Wins the Race
Now that your ingredients and tools are ready, it's time to melt and mix. Place your beeswax, coconut oil, and other solid ingredients in the heat-resistant bowl. Use a double boiler or create your own by placing the bowl over a saucepan with simmering water. Keep the heat low and let the ingredients melt slowly. High heat can destroy the goodness of your natural ingredients.
Once melted, stir in any liquid ingredients, and if you're adding colour, mix in your chosen tint. Keep it slow and steady to achieve a smooth, well-blended consistency. Patience is vital – don't rush the process. You want your lip balm to be a labour of love, not a hasty disaster.
Flavor and Scent: Personalize Your Lip Balm Experience
One of the best parts of making your lip balm is the ability to customize the flavour and scent. Add a few drops of essential oils like peppermint, lavender, or citrus for a delightful fragrance. Consider incorporating natural sweeteners like honey or vanilla extract if you like sweetness.
For tinted balms, experiment with different flavours that complement the colour. For instance, peppermint pairs well with a pink tint, while cocoa-flavoured balm goes hand in hand with a rich, brown hue. Get creative, but remember to start with small amounts to avoid overpowering your lip balm with fragrance or flavour.
Cooling and Setting: Patience Is a Virtue
After all the hard work, it's time to let your homemade lip balms and tints set. Pour the mixture into your chosen containers and resist the urge to test them out immediately. Allow the balms to cool and solidify at room temperature or in the refrigerator for a quicker setting.
Once set, cap the containers, and your homemade lip balm is ready for action. Avoid slathering it on thick – a little goes a long way. Your lips will thank you for the natural nourishment and the absence of harsh chemicals.
Experiment with Natural Colors: Embrace the Rainbow
Keep yourself from the standard lip balm colours. Get creative with natural ingredients to achieve a spectrum of hues. Beetroot powder provides a beautiful pink tint, while turmeric can give a subtle orange tone. Spirulina is excellent for a greenish tint, and cocoa powder can create a lovely brown shade. Experiment with different ratios to find the perfect colour palette for your homemade lip balms.
Add SPF for Lip Protection: Sun-Kissed Without the Burn
Protecting your lips from the sun is as important as caring for your skin. Consider adding a natural SPF element to your lip balm for an extra layer of defence. Coconut oil and red raspberry seed oil are known for their mild sun-blocking properties. While this won't replace your regular sunscreen, it adds a touch of sun protection to keep your lips healthy and kissable.
Label and Date Your Creations: Organization Is Key
As you dive into the world of DIY lip care, it's easy to forget what's what. Avoid confusion by labelling your homemade lip balms with the ingredients used and the creation date; this helps track your favourite formulations and ensures they are safe before expiration. A simple label can make a difference in maintaining an organized beauty routine.
Share the Love: Homemade Makes Great Gifts
Once you've perfected your lip balm creations, why not spread the love? Share your handmade balms and tints with friends and family as thoughtful and personalized gifts. Package them in cute, recycled boxes or tie a ribbon around the containers for an extra touch. Homemade lip balms make fantastic presents, and your loved ones will appreciate your effort to create something special just for them. Plus, it's a great way to introduce them to the wonderful world of DIY beauty.
Conclusion
As we wrap up our exploration into the art of homemade lip care, we hope you've found the inspiration to embark on your DIY adventure. Crafting lip balms and tints at home is more than just a creative outlet; it's a statement of self-love and individuality. By following the top tips and embracing additional suggestions, you've unlocked the door to a world where your lip care routine is as unique as you are. So, gather your ingredients, experiment fearlessly, and let your lips savour the goodness of your personalized creations. Here's to happy lips and the joy of crafting lip care essentials!
07/01/2024